First Steps
This part of the project has profited most from the information available in the Web, as well as from the suggestions of some DDV (German Steam Boat Association) members. When searching for a steam boiler, the most important issue to me was its suitability for being built in my basement shop. Kind of a naive idea, as it turned out later. I have experience in braze soldering, and that, together with the information that a suitable boiler could be built of copper parts, was enough for the time being.
Information from Web however showed that the brazing of copper heating coils - a wide-spread technology - is not a safe solution for certain boiler types, where the water level can fall below the upper coil connections. Thus: no copper, but steel parts.
It was the reading of Rainer Radow's web page which induced me to use stainless steel (1.4571 = X6CrNiMoTi 17). Changing considerations followed in the pursuit of sketching a useable water tube boiler. The book "Festigkeitsberechnungen im Apparate-und Rohrleitungsbau" by Walter Wagner was a great help when initially defining the material thicknesses and for the provisional strength calculations.

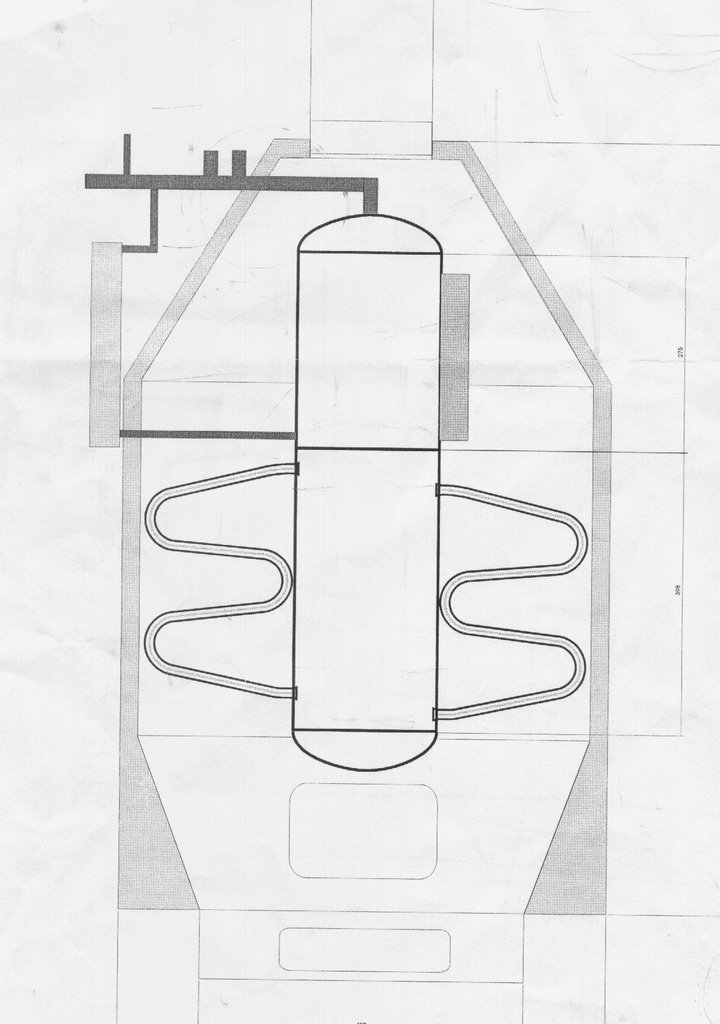
One of my initial sketches
It shows a central pressure vessel with approx. 40, vertically bent heating tubes. An inquiry at a workshop in Kiel - known to me because of its "pharmacist prices" - resulted in: Cost per heating tube (just for material and bending work) 34 EUR...!! Consequence: I purchased a used, rugged bending fixture (eBay), and... do it yourself!This layout had some disadvantages, above all the large number of welded joints (80) for the heating tubes. There followed the change to spiral heating coils and the discovery in the book "Steamboats and Modern Steam Launches" that something similar had been designed quite a long time ago, known as "Ofeldt boiler".

A further development of the design...

and the final drawing
Building and Testing
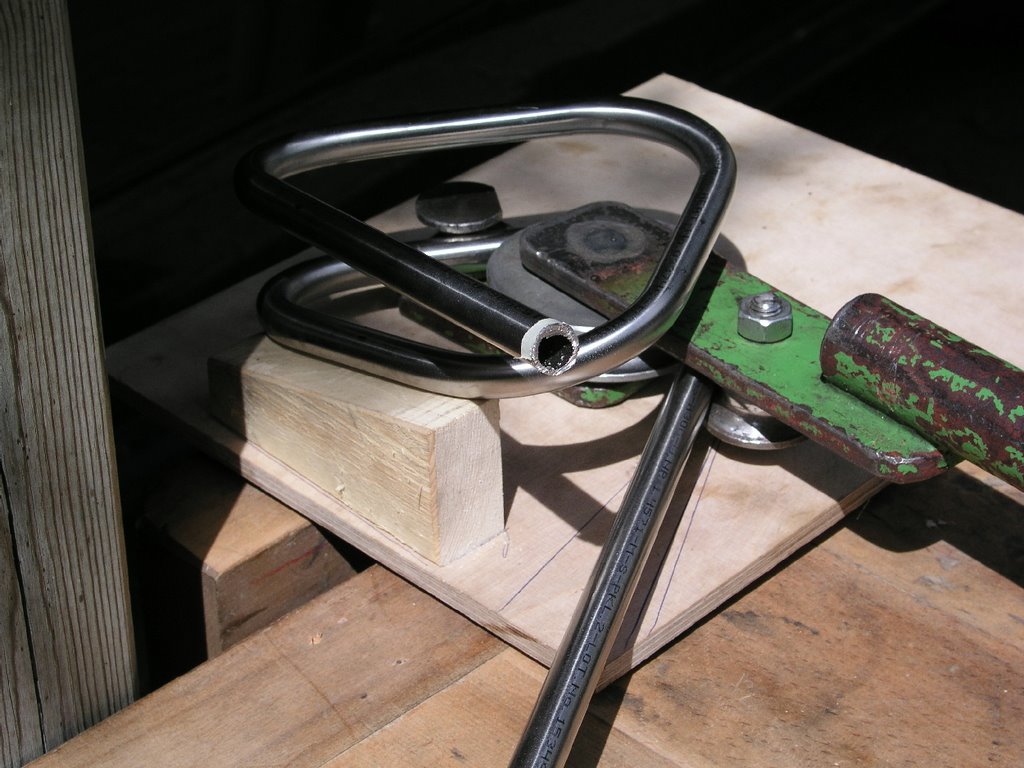
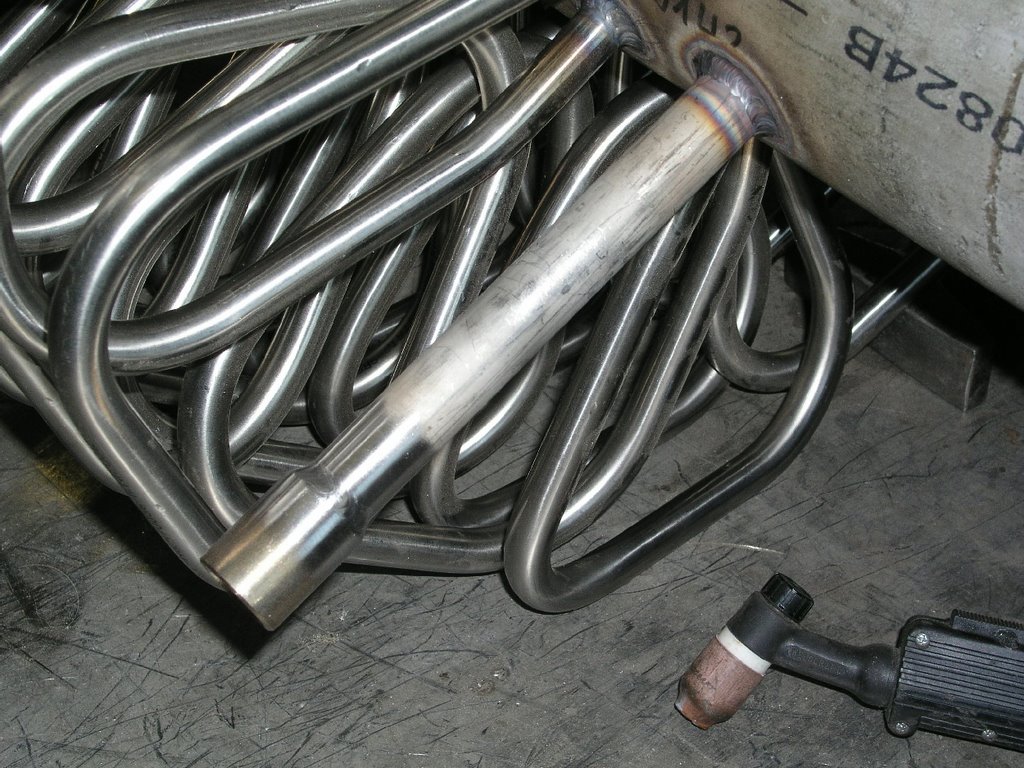
Now, the most difficult part of the job consisted in manufacturing the spiral heating coils. It was impossible for me to find a shop in the area around Kiel which could bend the coils for me. However, I had a tube bending fixture, and maybe... After some test bending (no tube which I could find in the basement remained straight any longer...), and by using a simple additional fixture, I was in the position of manufacturing triangular, spiral coils.
The decision to go ahead was taken inmediately, and I ordered all needed material for the pressure vessel and the heating coils (stainless steel 1.4571).
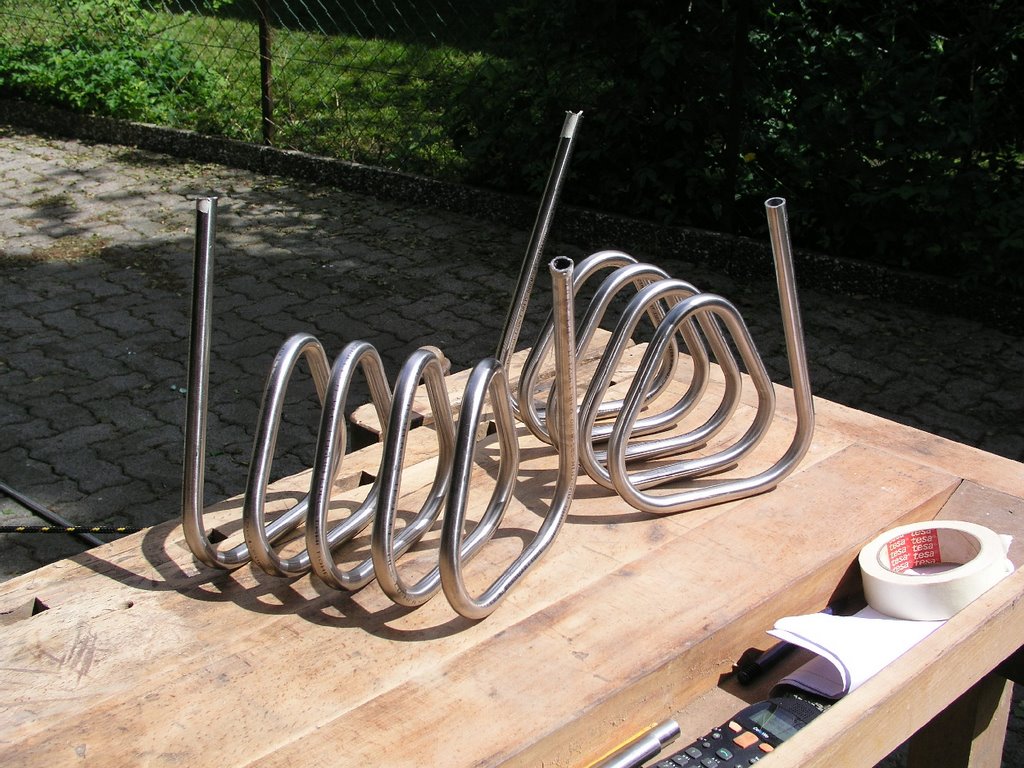
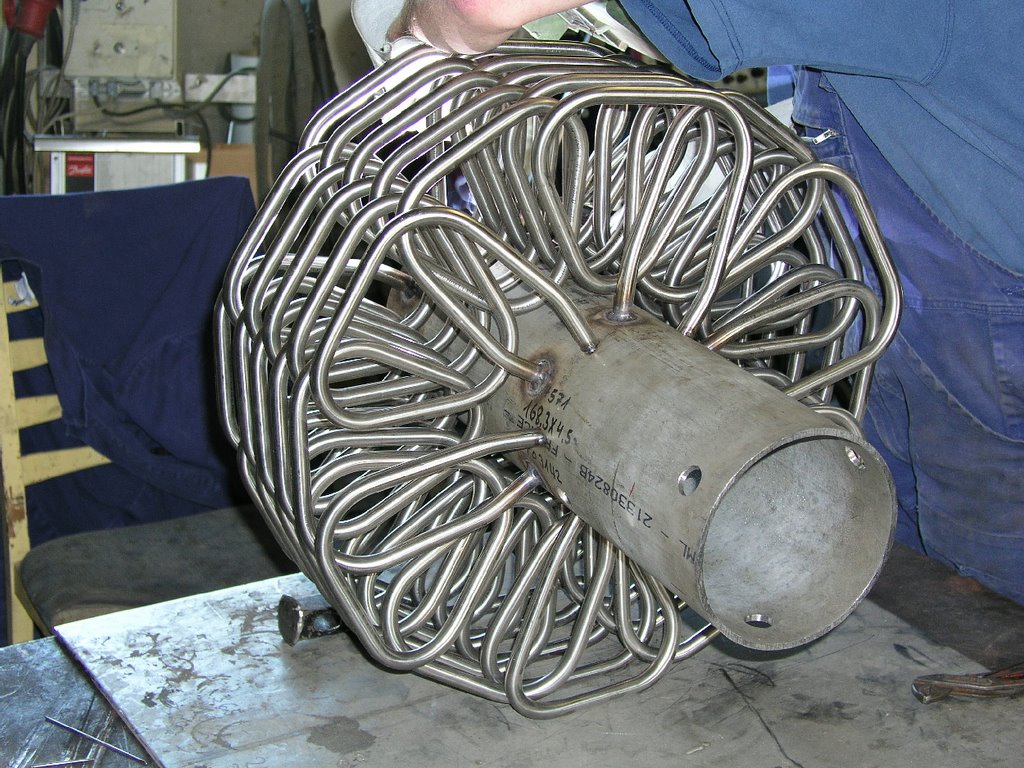
I bent all 12 heating coils in a single afternoon.
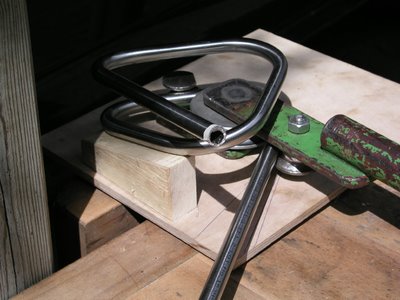
Here the simple fixture. The pitch of the spiral coils results from the height of the wooden wedge

The first turn is bent

The first two heating coils
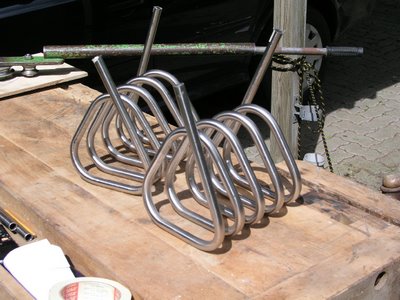
And because they look so good, a view from the other side...
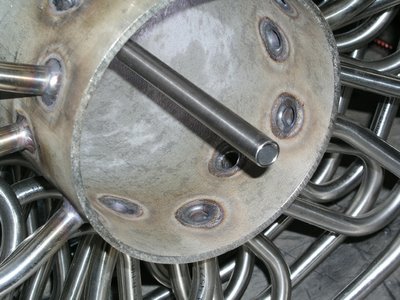
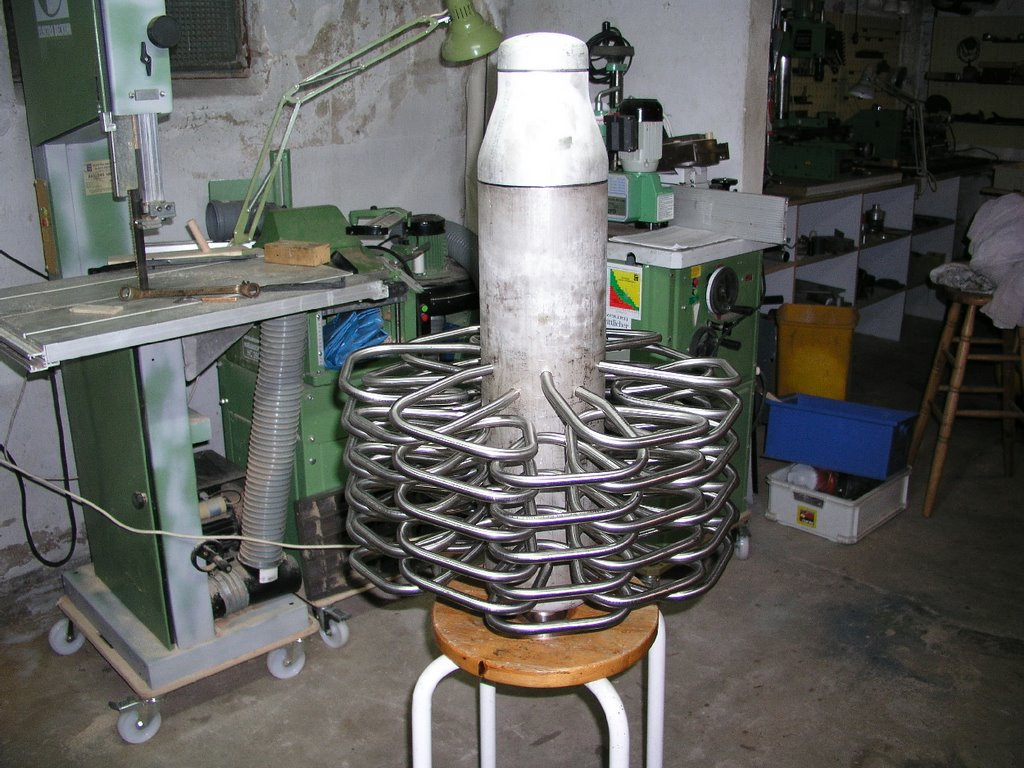
Drilling the central pressure vessel with my small milling machine was far more difficult.

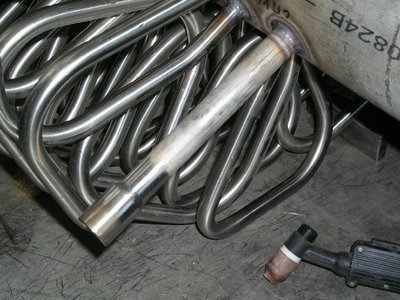
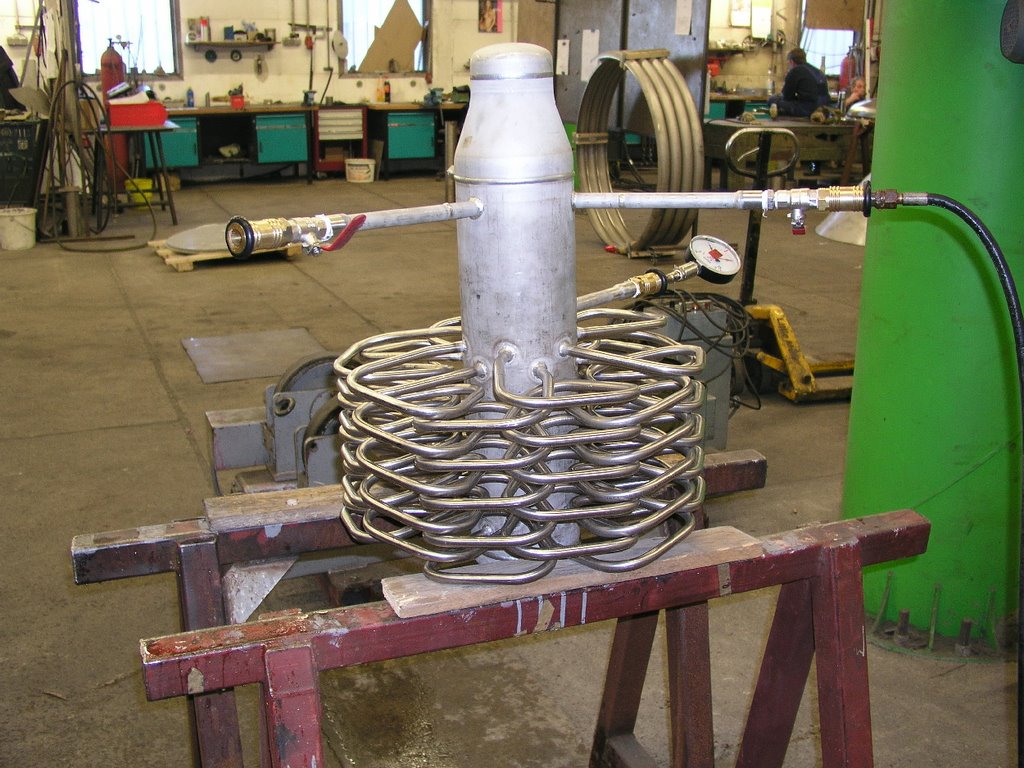
In the basement, everything inserted together

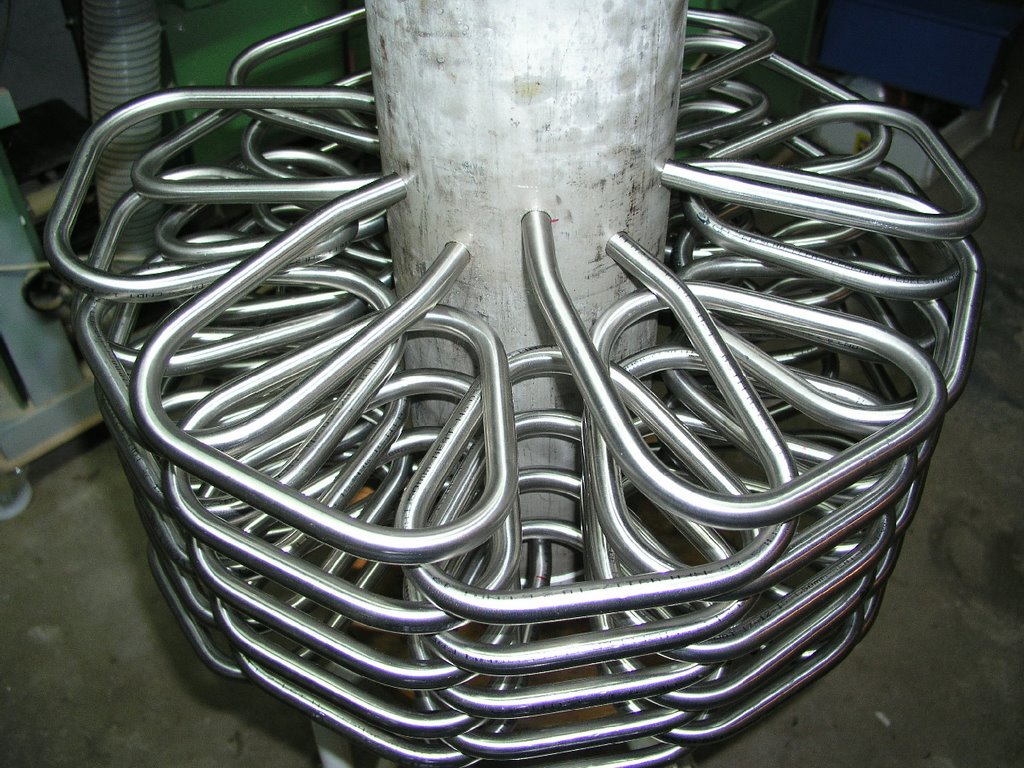
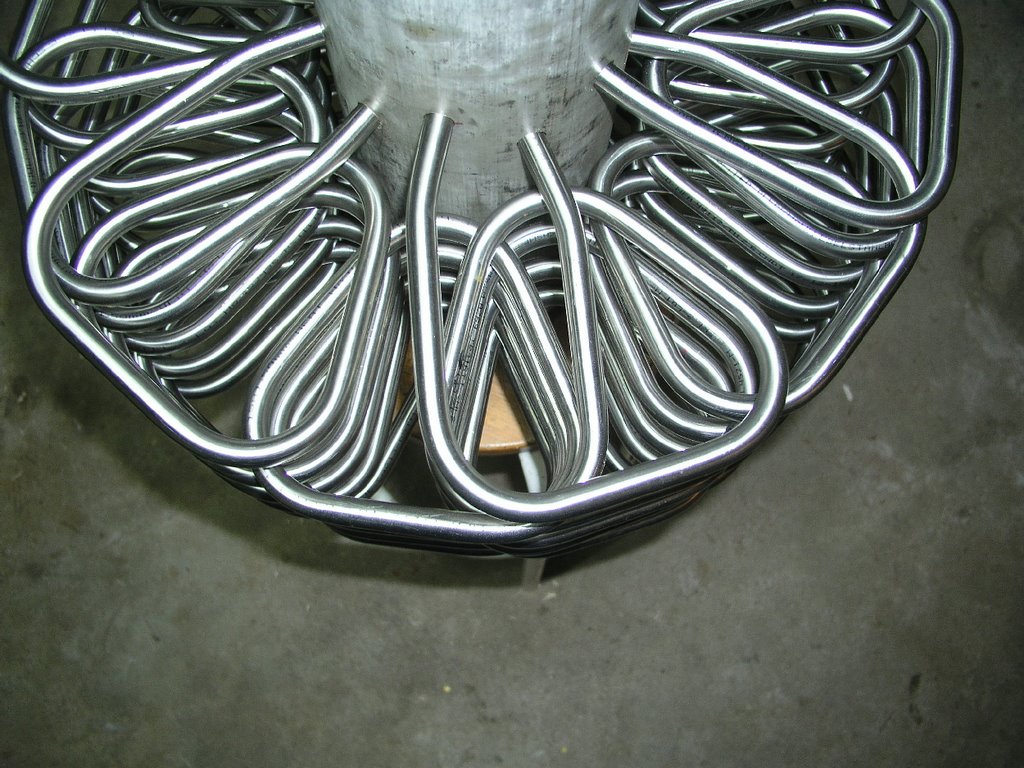
Detail view of the heating coils

I had designed the coils such as to reach an even distribution of the open spaces
In between I had become a member of the DDV which gave me access to a lot of information and help. Our boiler expert Manfred Achenbach carried out all necessary strength calculations for my boiler and prepared the required documentation for the code test and certification. I also got support and suggestions from Gerd (SL "Sunrise") who is also a DDV member.
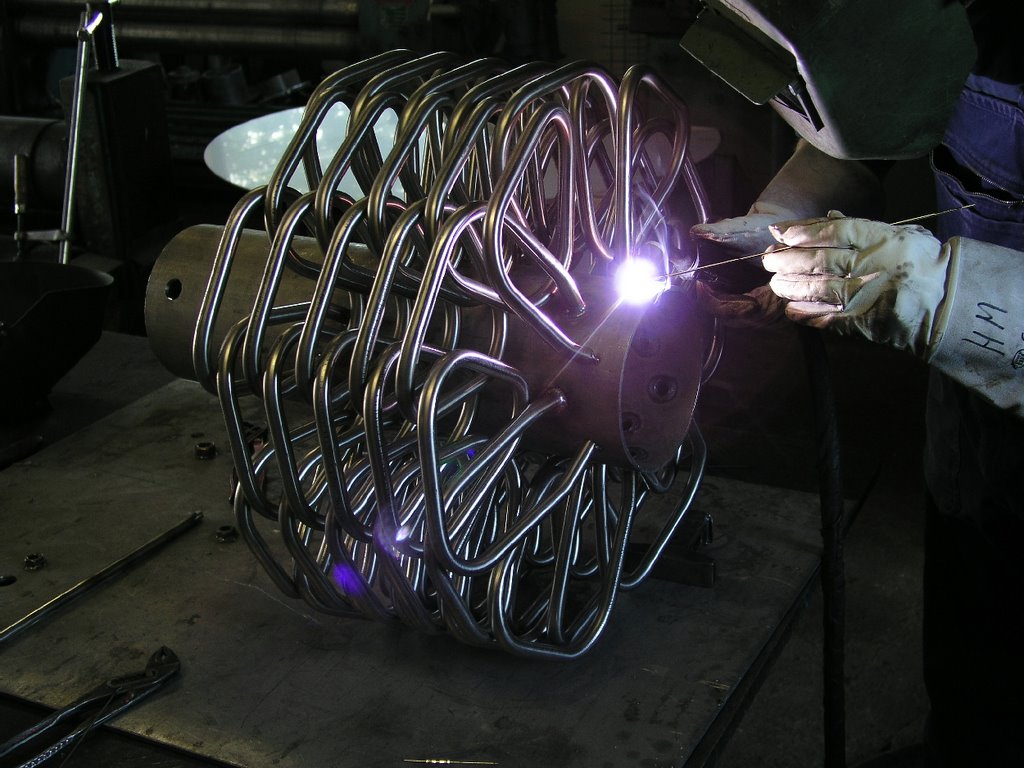
Until then I had assumed that the welding work could be carried out in any good-equipped workshop. Far from it! The TÜV (German Supervising Agency) had some objections, but helped me in finding a certified workshop. Eventually I landed at the shop of a WIG artist in Böxlung, close to the Danish border, who owns all required licenses and – which is far more important – is well known to the TÜV because of his quality work.

Tack-welding the coils

First step consisted in sealing the joint from inside, in order to prevent crevice corrosion. All spots were easily accesible.

The artist at work

Last fillet weld from outside
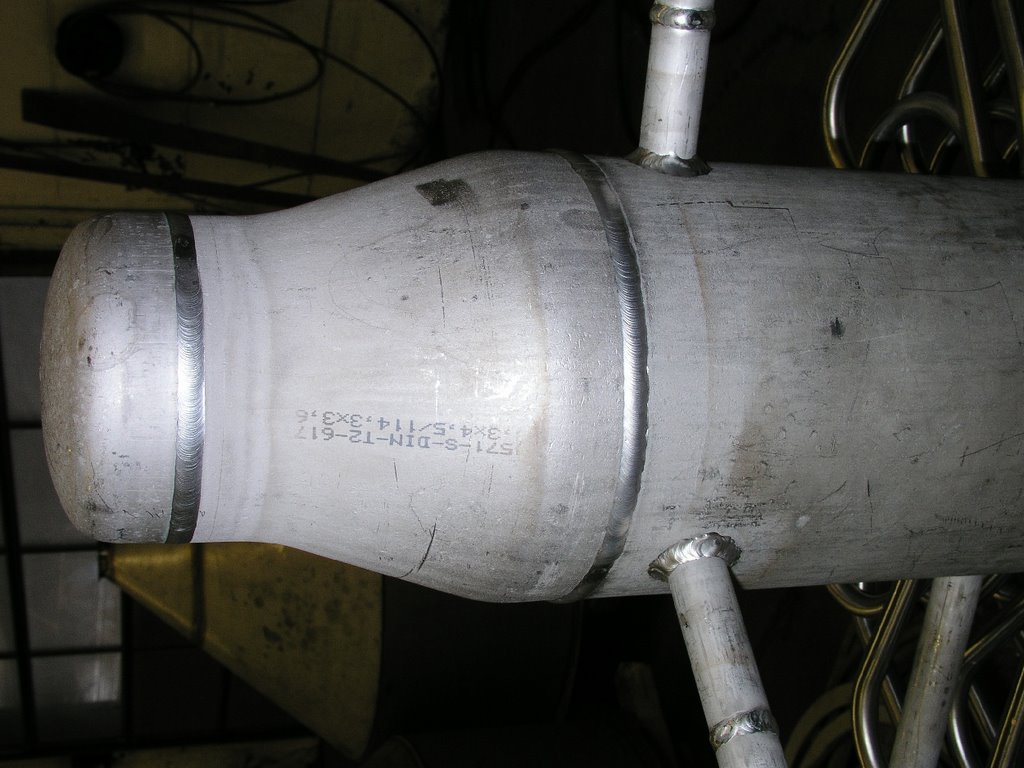
View of the welded seams inside the pressure vessel

Main steam lines
Water level connection

A quality job, isn't it?
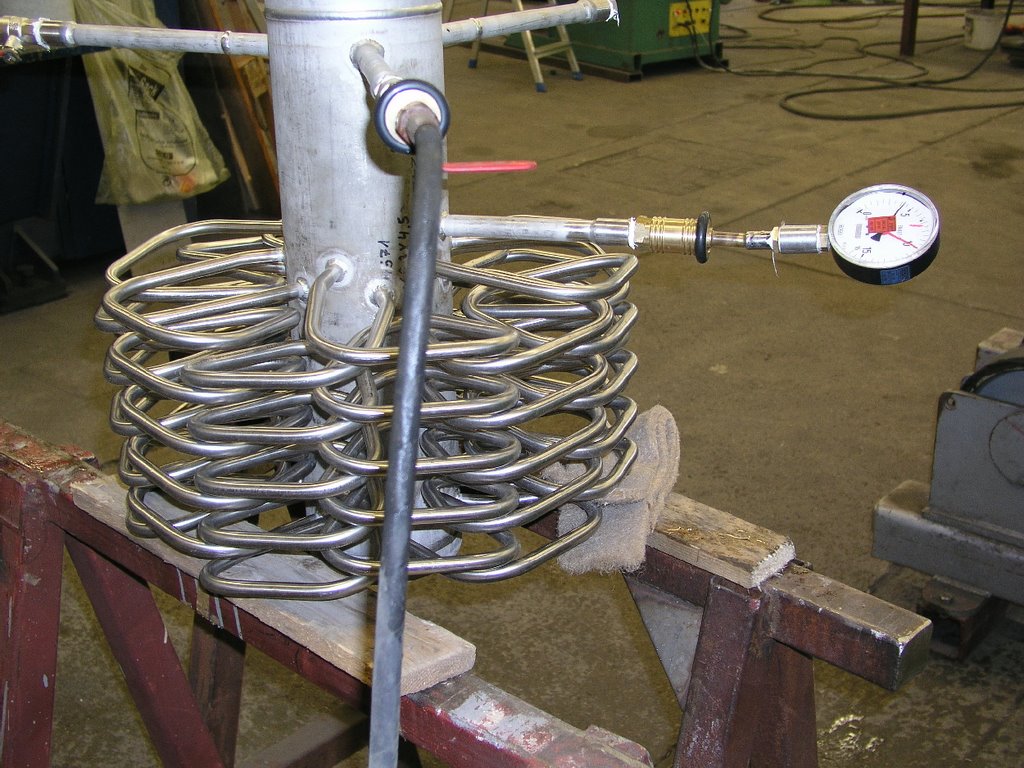
After a long waiting time (Mr. Möller is a busy man), the boiler could be taken to the certification test in Flensburg. The year long cooperation between the TÜV and the welder paid most remarkably. After a quick check of my drawings, material certificates and calculations, a pressure test at 18 bar (approx. 260 PSI) was performed. That was it...!

Ready for the pressure test

Code test passed!
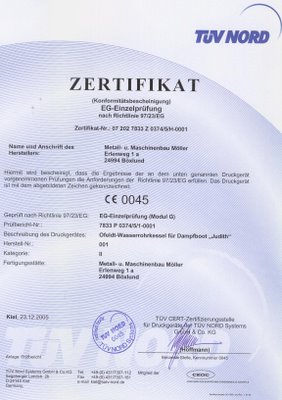
The TÜV sent me the supervised, approved documents back (just a birthday present), together with the corresponding certificate.
No certification is required in Germany for the boiler outer casing, which can be manufactured in any workshop. I have already selected a good (and low-price) one not far away from here. Initial discussions resulted in some changes to my design. Work to be started after Easter.
Technical Data
I had designed the boiler for the single cylinder engine
Heating surface: ca. 1.72 sqm (19 sf)
Operating pressure: max. 10 bar (ca. 150 psi)
Test pressure: 18 bar (ca. 260 psi)
Operating temperature: 183.2 °C
Volume: 17.8 Liter
Steam generation (wood fuel): ca. 43 kg/h
General Considerations
A water tube of this type is certainly not for everybody... Due to the fuel used (wood) and the modest water volume, it calls for a lot of attention during operation. After shutting off the main steam valve at full power, the safety valve would be activated in just a couple of minutes if no measures are taken to prevent it. The air supply has to be shut off completely. That means that the ashpit has to be absolutely airtight, something I have considered in the design.
A further disadvantage is the small evaporating surface within the pressure vessel. Sure, a lot of water can be carried over in the steam, especially when suddenly increasing the steam demand or when operating the steam whistle. I have provided for a relatively high steam dome, and the main steam lines are routed inside the vessel to the highest point in the dome. Experience will show whether these measures are sufficient to effectively prevent priming.
This boiler features of course some advantages: it is a real light weight, being quick in reaching the operating pressure. Furthermore, no dangerous material strain results during quick heating up, as is the case with the FT boilers. It can also be installed on board in the desired direction, so that the fire door can easily be reached from the side. And it has a small footprint...
A different story is the selection of material. If I were to build another boiler, I would select a good boiler steel grade instead of stainless steel. Apart from the horrendous price – especially if you purchase the stuff as a private man -, the strengh characteristics of this material deteriorate very quickly beyond a certain (admitedly high) temperature. This may be the reason why the use of stainless steel is not permissible for code boilers in the USA.
In order to increase the heating surface to a certain extent, I plan to install an economiser (approx. 3 sf) above the heating coils.


